Contents
So, you’re dealing with an unexpected water damage situation in your home, and you’re not quite sure how to tackle it effectively. The key lies in understanding the fundamental techniques for residential water damage restoration. From evaluating the extent of the damage to implementing specialized drying methods, each step plays an important role in restoring your home to its pre-damage condition. But what about mold remediation and sanitization procedures? These are essential components that shouldn’t be overlooked. Stick around to uncover the all-encompassing guide that will help you navigate through the restoration process seamlessly.
Key Takeaways
- Assess water damage sources and extent through inspections and moisture measurements.
- Utilize wet vacuums and dehumidifiers for efficient water extraction and drying.
- Implement air movers and monitor humidity levels for effective structural drying.
- Follow mold remediation procedures, including containment and thorough removal.
- Sanitize and disinfect affected areas to ensure a safe living environment post-restoration.
Assessing Water Damage
When evaluating water damage in your home, it’s essential to start by thoroughly inspecting all affected areas. The first step is to identify the source of the water. Whether it’s from a burst pipe, leaking roof, or flooding, knowing the water source is vital to effectively addressing the damage.
Look for signs of water pooling, dampness, or discoloration to trace back to the origin.
To accurately assess the extent of the damage, utilize specialized tools such as moisture meters and infrared cameras. Moisture meters help measure the level of moisture in materials like drywall, wood, and insulation. By identifying areas with high moisture content, you can pinpoint where water damage has occurred.
Infrared cameras are useful for detecting hidden water pockets behind walls or ceilings by capturing temperature variations.
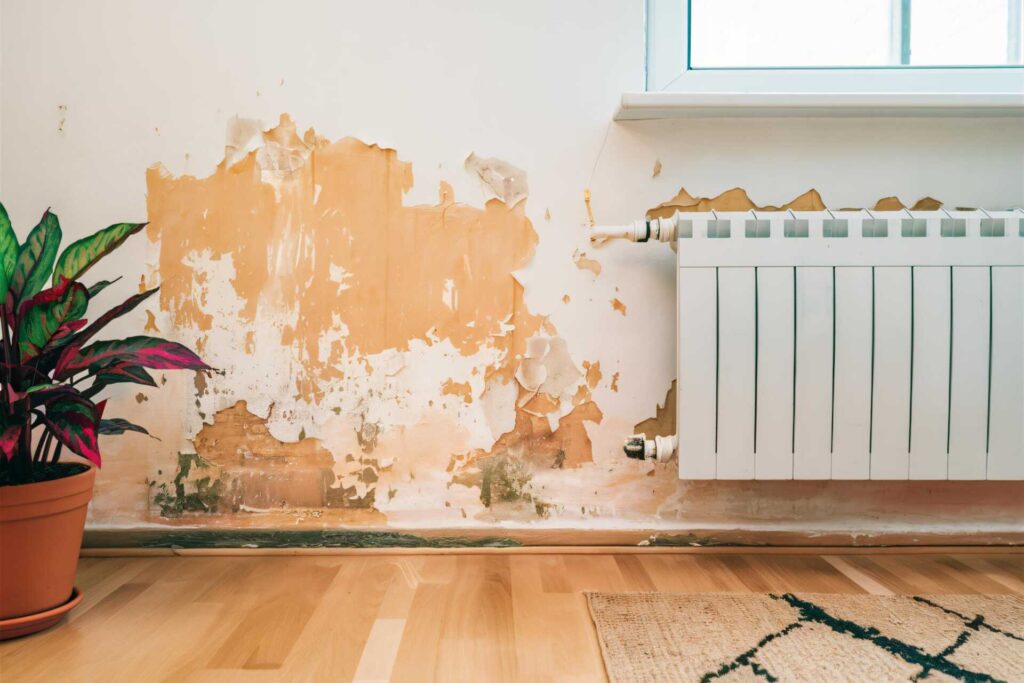
Inspect all surfaces, including walls, floors, and ceilings, for visible signs of damage like water stains, peeling paint, or warped flooring. Additionally, check for any musty odors, which could indicate mold growth resulting from water damage.
Document all findings with photographs or notes to provide a thorough overview of the damage for insurance purposes.
Water Extraction Methods
When it comes to water extraction methods for residential water damage restoration, utilizing wet vacuums is an effective way to remove excess water from affected areas.
These vacuums are specifically designed to handle water removal efficiently and quickly.
Additionally, employing dehumidifiers after extraction helps to dry out the remaining moisture, preventing mold growth and further damage.
Wet Vacuums for Extraction
One essential tool utilized in residential water damage restoration is the wet vacuum for extraction. Wet vacuums come in various types, each designed for specific water extraction needs.
Regular maintenance is key to ensuring peak performance and longevity of wet vacuums. Here are three key points to keep in mind regarding wet vacuums for extraction:
Types of Wet Vacuums: Wet vacuums come in different sizes and capacities, including portable units for small-scale water extraction and industrial-grade machines for larger restoration projects.
Maintenance Matters: Regularly clean the filters and hoses of your wet vacuum to prevent clogs and maintain suction power. Check for any signs of wear and tear to address issues promptly.
Proper Usage: Follow manufacturer guidelines for using the wet vacuum correctly to avoid damage and maximize efficiency. Confirm the vacuum is suitable for the type of water being extracted to prevent any mishaps during the restoration process.
Understanding the different wet vacuum types and confirming proper maintenance will help you effectively extract water during the restoration process.
Dehumidifiers for Drying
To effectively facilitate the drying process during residential water damage restoration, utilizing dehumidifiers is essential. Dehumidifiers play a vital role in removing excess moisture from the air, preventing mold growth, and promoting a quicker drying time.
There are two main types of dehumidifiers commonly used for water damage restoration: refrigerant dehumidifiers and desiccant dehumidifiers. Refrigerant dehumidifiers work by cooling the air to condense moisture, while desiccant dehumidifiers absorb moisture using a drying agent.
When selecting a dehumidifier, consider factors such as the size of the affected area, the extent of water damage, and the humidity levels. Proper placement of the dehumidifier is also important for ideal moisture control. Position the unit in the center of the affected area for maximum effectiveness.
Structural Drying Techniques
Utilizing advanced structural drying techniques is essential in the process of residential water damage restoration. When dealing with water-damaged homes, it’s imperative to efficiently dry the structure to prevent further issues like mold growth.
Here are some key techniques to help you effectively dry out your home:
Air Movement: Proper ventilation and air circulation are critical in drying out the structure. Placing industrial air movers strategically can help speed up the drying process by removing moisture-laden air and replacing it with drier air.
Moisture Control: Monitoring and controlling the humidity levels in the affected areas is important for successful structural drying. Using dehumidifiers alongside air movers can help extract excess moisture from the air, surfaces, and materials, preventing secondary damage.
Professional Expertise: Seeking the assistance of water damage restoration professionals can ensure that the structural drying process is carried out efficiently and effectively. These experts have the knowledge, experience, and specialized equipment to tackle even the most severe water damage scenarios.
Mold Remediation Process
When addressing water damage in residential properties, such as through advanced structural drying techniques, it’s vital to also be vigilant about potential mold growth.
Mold can start to develop within 24-48 hours after water damage occurs, posing health risks to you and your family. There are various mold types that can thrive in damp environments, including black mold, green mold, and white mold, with some being more harmful than others.
To effectively remediate mold after water damage, it’s important to follow a meticulous process. The first step is to assess the extent of the mold infestation and identify the type of mold present. This evaluation helps determine the appropriate remediation techniques needed.
Protective equipment such as gloves, masks, and goggles should be worn during the remediation process to minimize exposure to mold spores.
Next, containment measures are implemented to prevent the spread of mold to uncontaminated areas. This involves sealing off the affected area and using negative air pressure to keep mold spores from dispersing.
The mold is then carefully removed using specialized equipment and cleaning agents. After removal, thorough drying and dehumidification of the area are vital to prevent future mold growth.
Dehumidification Strategies
With water damage restoration efforts, dehumidification strategies play an essential role in ensuring the complete mitigation of moisture and the prevention of mold growth. Effective dehumidification is vital for restoring the indoor environment to a healthy state after water damage.
Here are some key strategies to help you tackle humidity control and enhance air circulation during the restoration process:
Utilize Dehumidifiers: Incorporate high-capacity dehumidifiers in the affected areas to extract excess moisture from the air, accelerating the drying process and reducing the risk of mold growth.
Enhance Ventilation: Improve air circulation by opening windows, using fans, or employing air movers. Proper ventilation helps in expelling damp air and bringing in fresh, dry air to aid in the drying process.
Monitor Humidity Levels: Keep a close eye on humidity levels using hygrometers. Maintaining humidity levels below 60% is vital for preventing mold proliferation and ensuring effective drying.
Sanitization and Disinfection Procedures
To effectively address water damage in residential settings, implementing thorough sanitization and disinfection procedures is essential for ensuring a safe and healthy living environment post-restoration. Following proper sanitization protocols and utilizing effective disinfection techniques are vital steps in the restoration process.
When it comes to sanitization, it’s important to start by removing any visible dirt or debris from surfaces. This can be done using a combination of cleaning agents and disinfectants. Make sure to focus on areas that were affected by water damage to prevent the growth of mold and bacteria.
Additionally, consider using antimicrobial solutions to further disinfect the affected areas thoroughly.
Disinfection techniques involve the use of EPA-approved disinfectants to kill any remaining microorganisms that might be present after the sanitization process. Pay close attention to high-touch surfaces such as doorknobs, countertops, and light switches, as these areas can harbor harmful bacteria.
Restoration and Repairs
When it comes to residential water damage restoration, repairing water-damaged structures is vital to prevent further issues like mold growth and structural instability.
Additionally, restoring damaged belongings such as furniture, electronics, and sentimental items requires specialized techniques to salvage and return them to their pre-damaged state.
Repairing Water-Damaged Structures
Amid the restoration and repair process for water-damaged structures, meticulous attention to detail is essential to ensure a thorough and effective outcome.
When it comes to repairing water-damaged structures, there are several critical steps to follow:
Evaluation: Begin by thoroughly evaluating the extent of the water damage to determine the scope of repairs needed.
Drying and Dehumidification: Swiftly removing excess water and moisture is essential to prevent further damage and mold growth.
Structural Repairs: Addressing any structural damage, such as weakened foundations or compromised walls, is crucial to ensure the safety and integrity of the building.
Restoring Damaged Belongings
As you move forward in the restoration process, shifting your focus from repairing the structural damage to restoring your damaged belongings becomes a significant step.
Salvaging textiles that have been affected by water damage requires a delicate approach. Begin by gently rinsing and drying the items, then consult with a professional restoration service for further treatment.
Preserving photographs is another vital task. Carefully separate any stuck-together photos and lay them flat to dry. Avoid peeling apart wet photos as they may tear easily. Place wax paper between photos to prevent sticking during the drying process.
When dealing with water-damaged electronics, it’s important to exercise caution. Disconnect the power source immediately and avoid turning on the device until a professional has inspected it.
For furniture, remove any wet upholstery and cushions to dry separately. Clean and disinfect the furniture frame to prevent mold growth.
Summary
Congratulations on successfully maneuvering the treacherous waters of residential water damage restoration! You’ve mastered the art of evaluating, extracting, and drying with finesse. Mold doesn’t stand a chance against your remediation skills, and sanitization is your middle name. Now go forth and restore those damaged structures like the water warrior you are. Remember, when life gives you water damage, you give it a thorough restoration!
Recent Posts
Top Strategies for Post-Flood Mold Removal
When faced with post-flood mold, you need to be equipped with the right strategies for
5 Best Practices for Mold Removal After Flooding
When tackling mold removal post-flooding, remember to start by inspecting and evaluating the extent of
Why Prioritize Mold Removal After Flooding?
Did you know that mold can start growing in your home within just one to
