

How to Spot Ceiling Water Damage and What to Do First
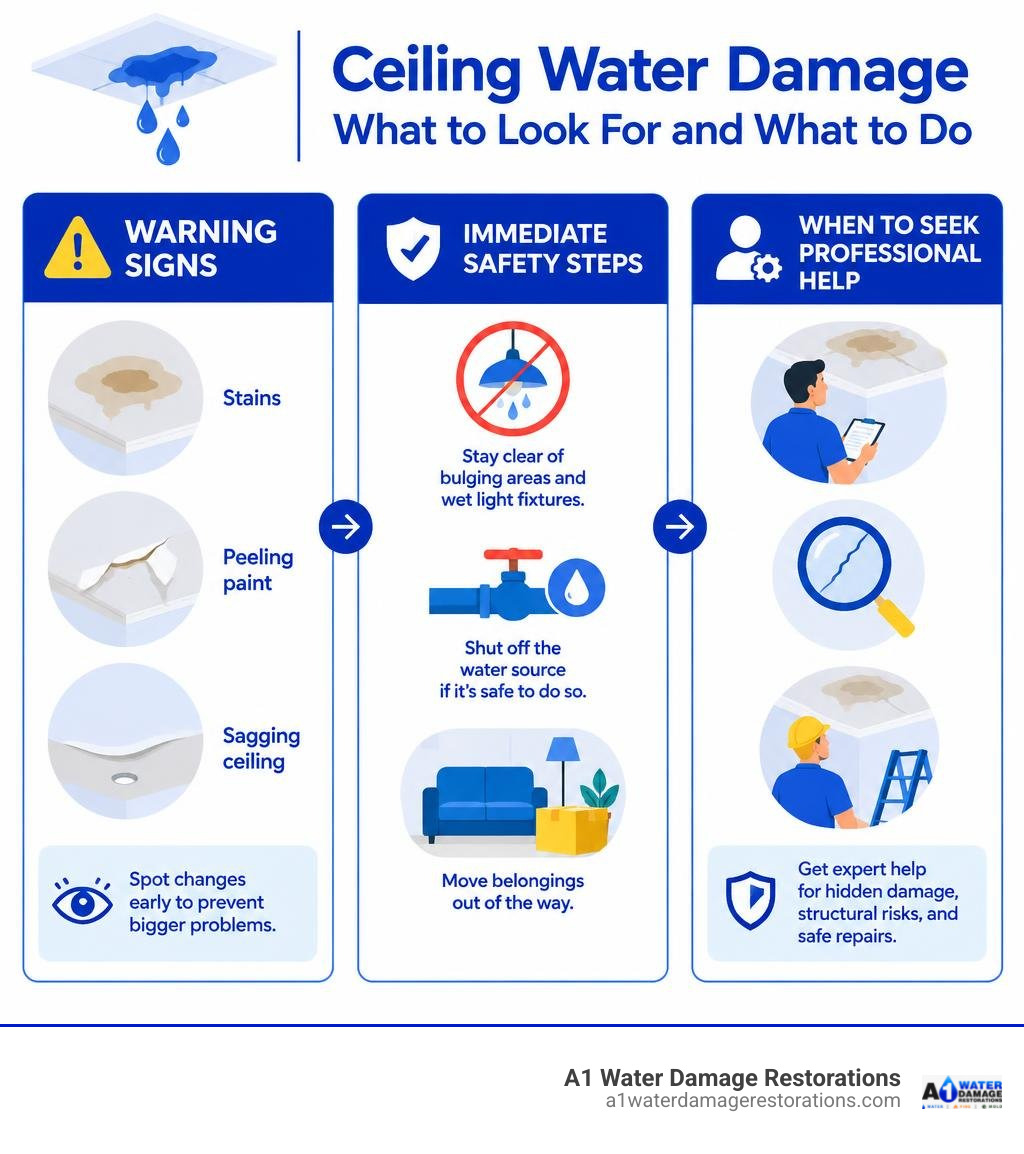
A growing stain, peeling paint, or a sagging ceiling can signal water damage. Stay clear of any bulging area and wet light fixtures. If you can do so safely, shut off the water source and move belongings out of the way. Then note whether the stain grows after rain or plumbing use. Fix the leak and confirm the ceiling is dry before you patch or paint it.
I’m Cole Nudel, a disaster restoration professional with A1 Water Damage Restorations in the Denver area. My work in disaster recovery helps me guide property owners through water damage ceiling concerns, from early warning signs to knowing when a repair needs a professional.
Assessing the Severity and Signs of a Water Damage Ceiling
When water enters an overhead cavity, drywall acts like a giant sponge. Gypsum—the soft mineral core of modern drywall panels—loses structural rigidity rapidly as it absorbs moisture. What starts as a subtle visual blemish can escalate within hours into a heavy, hazardous mass threatening to collapse under its own trapped weight.
Assessing the situation requires looking beyond the visible surface. A minor water mark often conceals a widespread footprint of saturated insulation and damp joists hidden directly above. Evaluating ceiling damage systematically ensures that structural hazards, hidden electrical risks, and microbial growth are addressed before cosmetic fixes begin.
Early Warning Signs of Water Damage Ceiling Discoloration and Sagging
Water damage does not always present as an active downpour through your light fixtures. In many cases, it begins with slow, subtle alterations to the ceiling surface:
- Discoloration Rings: Mineral deposits and dissolved tannins from framing create yellow, mustard, or rust-colored stains. Darker concentric outer rings indicate intermittent cycles of wetting and drying.
- Paint Peeling and Blistering: Latex ceiling paint stretches and separates from the drywall face paper, forming water-filled blisters or flaking strips.
- Surface Softness and Sagging: Wet gypsum loses internal bond strength, causing the ceiling panel to bow downward between ceiling joists or pull free from drywall screws.
- Musty Smells: Damp cellulose insulation and enclosed ceiling framing emit an earthy odor long before mold colonies become visible to the eye.
- Joint Tape Separation: The paper tape covering drywall seams bubbles, wrinkles, or peels away as moisture dissolves the underlying joint compound.
| Visual Ceiling Symptom | Moisture Level Indication | Structural Damage Severity | Recommended Action |
|---|---|---|---|
| Faint Yellow/Tan Ring | Low to Moderate (<15%) | Surface / Cosmetic | Track boundaries; test with pin moisture meter |
| Blistering Paint / Flaking | Moderate (15%–17%) | Intermediate Drywall Softening | Scrape loose paint; isolate moisture source |
| Bowing Drywall / Pillowing | High (>17% Saturation) | Severe Risk of Overhead Failure | Relieve water weight; remove and replace board |
| Dark Mold Growth Blooms | Chronic Saturation | Microbial Hazard & Rot Risk | Contain area; arrange professional mold remediation |
Distinguishing Between Active Leaks and Dormant Stains
Before executing any drywall repairs, you must determine whether the stain represents an active leak or an old, resolved issue.
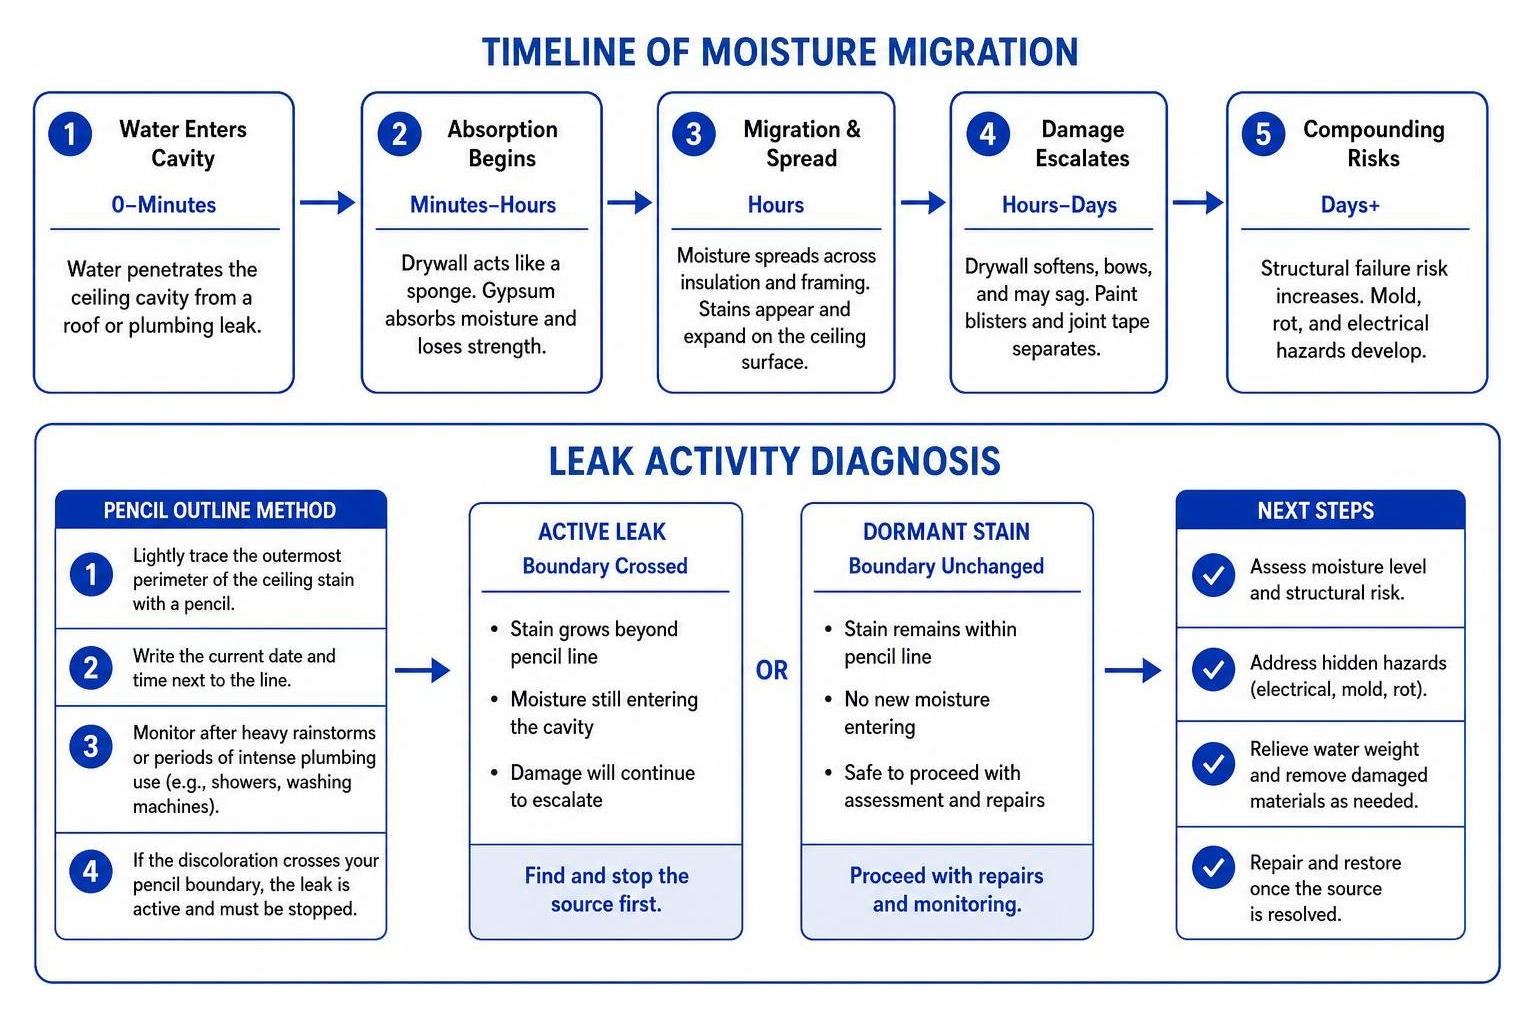
To verify leak activity without specialized tools, use the pencil outline method:
- Take a standard pencil and lightly trace along the outermost perimeter of the ceiling stain.
- Write the current date and time directly next to the line.
- Monitor the stain after heavy rainstorms or periods of intense plumbing use (such as running upstairs showers or washing machines).
- If the discoloration crosses your pencil boundary, you have an active leak that must be traced and stopped at the source.
Beyond visual tracking, testing with a calibrated moisture meter provides conclusive data. Dry drywall typically registers between 5% and 12% moisture content. Any reading exceeding 16% to 17% signals active saturation. If you discover an active flow, review our guide on what to do immediately when your ceiling got wet to contain the spread before building materials degrade further.
Locating the Moisture Source Without Damaging Drywall
Water rarely travels in a straight vertical line. Liquid flows along joists, follows electrical conduits, travels down plumbing pipes, and puddles in low spots before penetrating drywall. Consequently, a ceiling stain can appear ten to fifteen feet away from the actual breach.
Understanding indoor moisture and fluid migration pathways helps locate moisture sources non-destructively, preserving drywall until removal is strictly necessary.
Inspecting Attic Spaces and Roof Penetrations
When stains appear beneath an unconditioned roof cavity, the attic is your first checkpoint:
- Flashing and Roof Penetrations: Check the underside of the roof decking around chimneys, skylights, plumbing vent stacks, and exhaust boots. Cracked rubber boots and deteriorated metal flashing are frequent culprits.
- Damaged or Missing Shingles: Heavy winds, hail impact, and aging asphalt shingles allow wind-driven rain to enter underlayment seams.
- Ice Dams: In colder mountain climates, melted snow freezes at cold roof eaves, creating ice dams that force water backward under shingles and into ceiling insulation.
- Attic Condensation: Insufficient attic ventilation causes warm, humid indoor air to condense on cold roof sheathing during winter months, eventually dripping onto the ceiling drywall below.
Pinpointing Plumbing Lines and HVAC Condensation Issues
If the water damage ceiling sits beneath an upper story, plumbing and mechanical fixtures are the primary suspects:
- Shower Pans and Tub Surrounds: Failing grout, degraded perimeter caulking, or cracked shower bases allow water to bypass floor barriers during bathing.
- Pressurized Supply Lines: Pinhole leaks in copper, PEX, or CPVC supply pipes produce continuous spraying or slow dripping inside floor cavities. If you suspect plumbing failures, consult our advice on handling burst pipes and bathroom flood emergencies.
- HVAC Condensate Drain Lines: Air conditioning evaporator coils produce significant condensation. Algae clogs in condensate lines cause drain pans to overflow directly into the ceiling framing below.
- Drain P-Traps and Wax Rings: Worn toilet wax seals leak dirty water into the subfloor only when the fixture is flushed, making them tricky to catch without systematic testing.
Non-Invasive Diagnostics with Thermal Imaging and Moisture Meters
Professional restoration teams avoid unnecessary demolition by deploying advanced diagnostic tools to trace hidden water pathways behind finished ceilings.
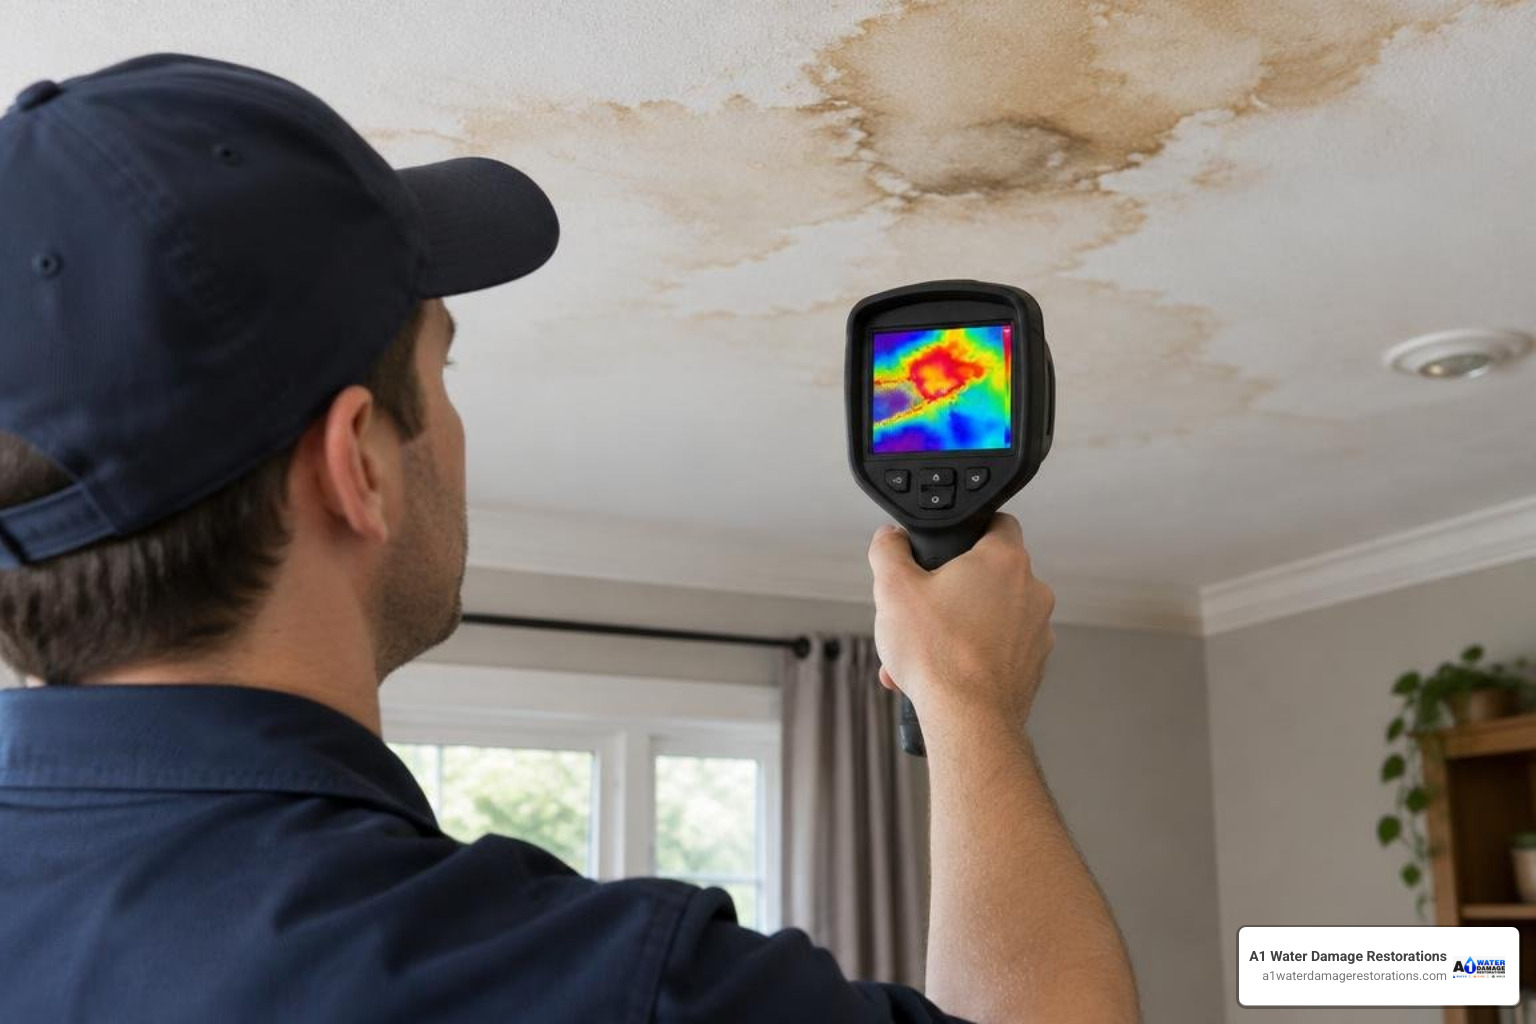
- Infrared Thermography: Thermal imaging cameras detect subtle evaporative cooling effects behind ceiling drywall. Wet building materials show up as dark, cool anomalies, revealing the complete footprint of hidden moisture without making a single cut.
- Non-Invasive Moisture Meters: Pinless radio-frequency meters measure deep structural moisture up to an inch behind surfaces without leaving holes, allowing technicians to map the perimeter of saturated framing rapidly.
Immediate Emergency Mitigation and Safety Protocols
Overhead water damage presents immediate life-safety hazards. Saturated drywall can weigh up to several times its dry weight, creating an imminent risk of structural collapse. Water migrating through electrical junction boxes or recessed lights can also ignite electrical fires or cause dangerous shock hazards.
Always cut power at the main electrical breaker panel to any lighting circuits, ceiling fans, or outlets located in the affected room before inspecting or handling damp drywall. For comprehensive mitigation standards, review our essential guide to professional water damage remediation.
Safely Draining a Bulging or Sagging Ceiling
When drywall holds a pocket of standing water, controlled drainage relieves hydrostatic pressure and prevents the entire panel from collapsing suddenly:
- Clear all furniture and personal belongings from beneath the sagging area.
- Place a large collection bucket or heavy-duty plastic tub directly beneath the lowest point of the bulge.
- Lay a tarp or plastic drop cloth across the surrounding floor to catch splashes.
- Put on protective eyewear, gloves, and a dust mask.
- Using a long screwdriver, awl, or cordless drill with a small bit, stand outside the fall line and carefully puncture a single hole in the dead center of the bulge.
- Allow trapped water to drain into the bucket in a controlled stream rather than letting wet drywall tear loose from its fasteners.
Preventing Rapid Mold Growth Within the 24-to-48-Hour Window
Fungal spores exist naturally in indoor air, requiring only moisture, warmth, and an organic food source (such as the paper backing of drywall or wood framing) to germinate.
According to EPA guidelines, mold can colonize wet ceiling assemblies within 24 to 48 hours. Halting microbial proliferation requires:
- Rapid Extraction: Removing standing liquid and damp insulation without delay.
- Humidity Suppression: Lowering indoor relative humidity below 50% to 60% using commercial dehumidification.
- Continuous Air Movement: Establishing targeted airflow across structural surfaces.
- Antimicrobial Treatment: Applying EPA-registered botanicals or antimicrobials to framing lumber during the dry-out phase.
Learn more about rapid intervention strategies by reading about stopping progressive ceiling leak damage.
Repair, Restoration, and Material Replacement Decisions
Determining whether to dry ceiling drywall in place or cut it out depends on the saturation level, the type of water involved, and the physical integrity of the gypsum core.
For large-scale water intrusions, applying comprehensive water removal and flood cleanup techniques is essential before rebuilding.
How Long Does a Water Damage Ceiling Take to Dry Completely?
Ceiling assemblies dried using professional equipment typically take 48 to 72 hours to reach baseline moisture equilibrium. Saturated structural joists, double-layered drywall, or spaces packed with wet cellulose insulation can require up to 5 to 7 days.
Drying progress should never be evaluated by surface touch alone. Restoration professionals use penetrating pin-type meters to verify that deep framing readings match regional dry standards (typically 8% to 12% moisture content) before closing ceiling cavities.
Repairing Minor Stains vs. Replacing Saturated Drywall
Use these criteria when deciding between spot repairs and material replacement:
- Retain and Dry in Place: If moisture meter readings stay under 16%, the drywall panel remains firm with no sagging, the paper backing has not delaminated, and the intrusion came from clean Category 1 supply water, the ceiling can safely be dried, treated, sealed, and repainted.
- Remove and Replace: Drywall must be cut out and discarded if the core feels soft or spongy, fasteners have pulled through, moisture readings exceed 17% after drying efforts, or the water source involved gray/black water (such as sewage backups or roof runoff passing through dirty attic cavities).
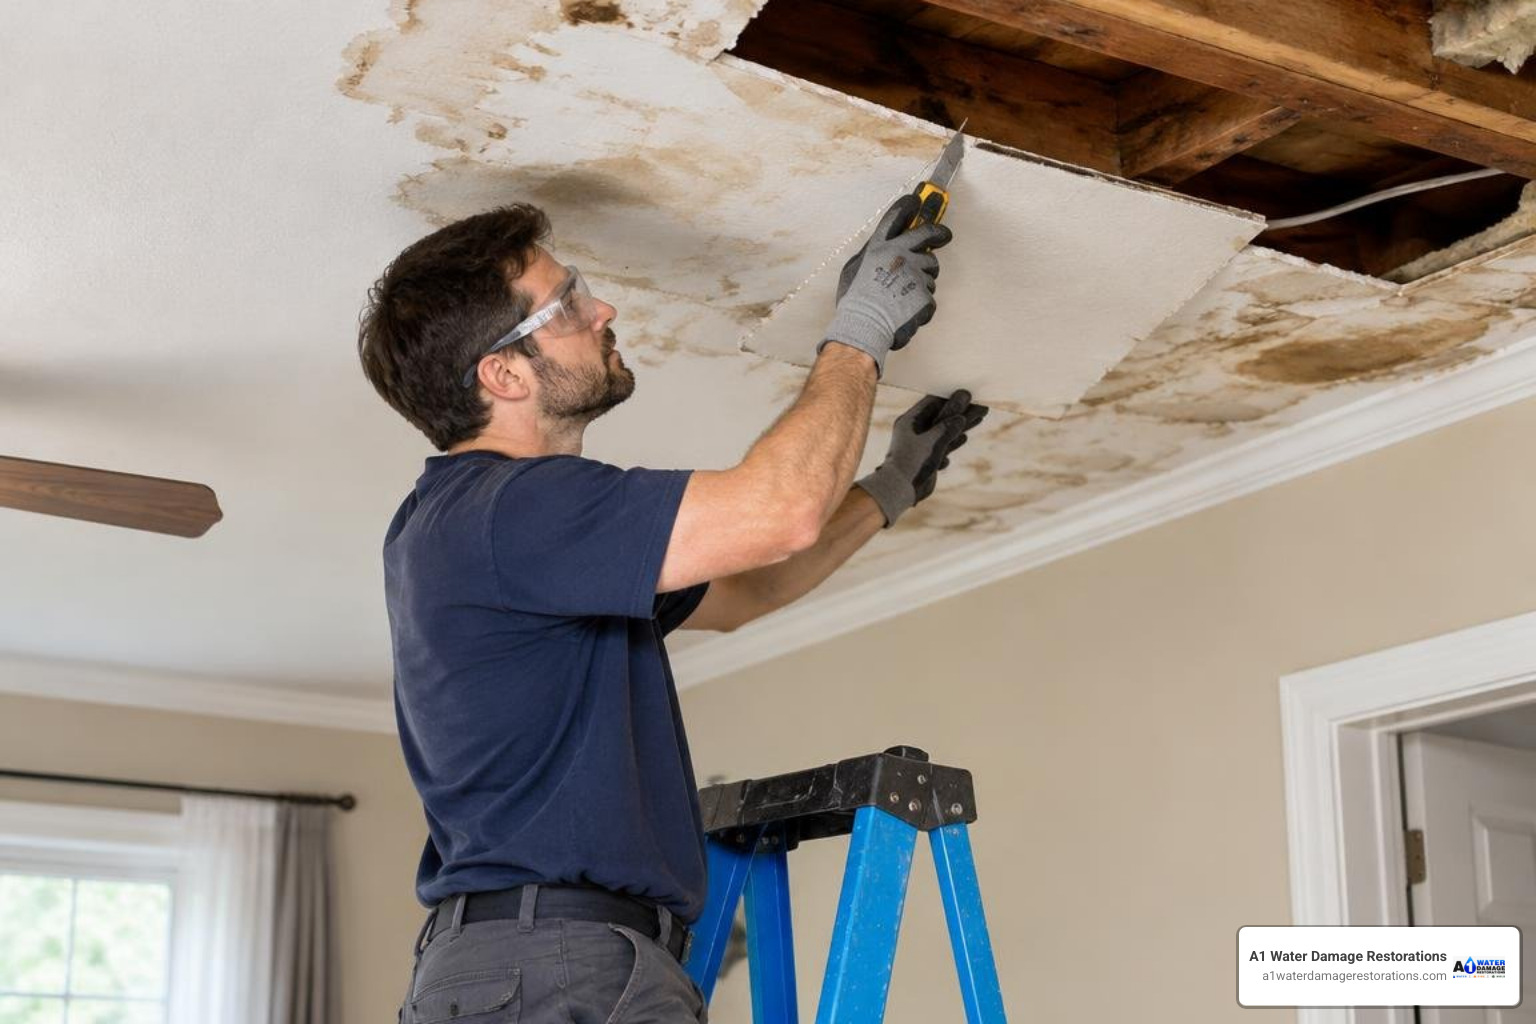
When removing wet ceiling materials, adhere to the 10-square-foot rule: if mold or contaminated water covers an area larger than 10 square feet, professional containment is recommended to prevent spreading airborne contaminants.
All saturated insulation resting on top of the ceiling must also be bagged and replaced; wet fiberglass or cellulose insulation permanently loses its R-value and creates an ideal breeding ground for hidden mold. To ensure structural moisture is addressed thoroughly, utilize professional water extraction protocols.
Primer Selection and Repainting Best Practices
Standard latex wall paints and general-purpose water-based primers cannot block water stains. Water-soluble minerals and wood tannins dissolve into the moisture of water-based paint, bleeding straight through multiple coats within days.
To achieve a permanent cosmetic finish:
- Ensure the drywall patch is fully sanded, dusted, and dry.
- Apply one to two coats of a dedicated oil-based (alkyd) or shellac-based stain-blocking primer directly over the stained or repaired area.
- Allow the primer to cure fully according to manufacturer specifications.
- Feather the texture across the repaired joint using matching spray or roller textures.
- Coat the entire ceiling panel from corner to corner using quality flat ceiling paint or compatible building materials and ceiling panels to avoid noticeable sheen differences.
Restoration Costs and Homeowners Insurance Coverage
The cost of restoring an overhead water intrusion depends on structural access, the contaminated category of the water, and whether framing repairs or mold remediation are required.
Following the five simple steps in structural restoration helps control overall expenses while protecting property value.
Understanding Repair Costs Across Damage Severity Levels
Ceiling repairs generally fall into three cost tiers:
- Minor Cosmetic Repair ($300 – $800): Sealing small surface stains, skim-coating joint tape, applying stain-blocking primer, and painting a localized section.
- Moderate Drywall Replacement ($1,000 – $3,500): Cutting out up to a full room’s ceiling drywall, extracting trapped cavity moisture, replacing wet insulation, hanging fresh drywall panels, matching texture, and repainting.
- Severe Structural Restoration ($5,000 – $15,000+): Full structural remediation addressing rotted floor joists, damaged HVAC ducting, rewiring compromised electrical lines, and extensive mold remediation.
Primary Cost Variables for Overhead Ceiling Restoration:
- Square footage of affected drywall and underlying insulation
- Height and accessibility of the ceiling (e.g., vaulted ceilings requiring scaffolding)
- Presence of textured or acoustic (popcorn) finishes
- Contamination category of the water source (Category 1 clean water vs. Category 3 sewage)
- Extent of required structural timber drying and mold remediation
Navigating Homeowners Insurance Claims and Coverage
Standard HO-3 homeowners insurance policies generally cover overhead water damage if the underlying cause was sudden and accidental—such as a burst supply pipe, an appliance failure, or wind-driven rain from a storm-damaged roof.
Conversely, damage resulting from gradual, long-term wear and tear, maintenance neglect (such as an old, rusted roof that leaked for months), or external surface flooding is typically excluded.
To protect your claim:
- Document all damage thoroughly with photos and video before removing any materials.
- Retain broken plumbing fixtures or parts for adjuster inspection.
- Request professional moisture-mapping reports and psychrometric drying logs from your restoration contractor to prove the severity of the loss.
Frequently Asked Questions About Ceiling Water Damage
Can I simply paint over a water stain on the ceiling?
No. Standard latex ceiling paint will not seal water stains. Water-soluble tannins and minerals will dissolve into the fresh paint layer and bleed back through to the surface. Furthermore, painting over a damp ceiling traps moisture inside the drywall core, accelerating mold growth. Always verify the drywall is dry with a moisture meter and apply a dedicated oil- or shellac-based stain-blocking primer before applying ceiling paint.
Should I poke a hole in a sagging ceiling filled with water?
Yes, if the ceiling is visibly bulging and holding pooled water, carefully puncturing a small drainage hole in the center of the bulge is recommended. Place buckets underneath and puncture the drywall with a screwdriver while standing clear of the area. This controlled release relieves heavy hydrostatic pressure, preventing the entire water-logged drywall panel from tearing loose and collapsing into the room.
Does homeowners insurance cover ceiling water damage from a leaking roof?
Insurance covers interior ceiling damage if the roof leak was caused by a sudden, covered peril—such as hail puncturing shingles, fallen tree limbs, or storm winds tearing away roof flashing. If the leak stems from general age, worn-out shingles, or delayed maintenance, the policy will likely deny both the roof repair and the resulting interior ceiling damage.
Conclusion
Ceiling water damage demands prompt, methodical action. Overlooking a minor ring or delaying leak mitigation allows trapped moisture to compromise structural integrity, rot framing timbers, and foster hazardous mold colonies within 48 hours.
By identifying warning signs early, verifying complete structural dryness, and applying proven containment protocols, you can protect your property from escalating damage.
When facing complex leaks, sagging ceilings, or extensive moisture spread across the Denver Metro Area, our team at A1 Water Damage Restorations delivers 24/7 IICRC-certified expertise to dry, secure, and rebuild your home safely. Learn more about our comprehensive structural repair approach by exploring our guide on fixing a water damaged ceiling after a leak.